


  |  | ||
Follow the procedure below to replace an ink collector unit.
![]()
|
![]()
|
![]()
Do not use an ink collector unit that has not been used for a long time.
Do not touch the ink collector unit' chip contacts.
Attach or detach the ink collector unit only when you replace it.
Take care not to drop the ink collector unit.
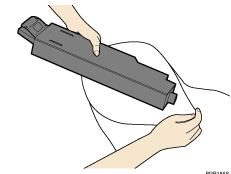
Take care not to drop the ink collector unit when putting it in the supplied plastic bag. The bag might tear, causing ink to spill.
Make sure the ink collector unit is fully inserted. If it is not, ink will leak inside the printer.
Replace the ink collector unit when the following message appears on the control panel:
The following message appears when the ink collector unit is full.
| Ink Collector Unit is Full |
| Replace Ink Collector Unit |
Remove the ink collector unit' packaging.
While pressing the recessed area (![]() ) of the right front cover, open the cover (
) of the right front cover, open the cover (![]() ).
).
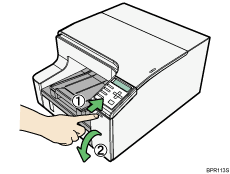
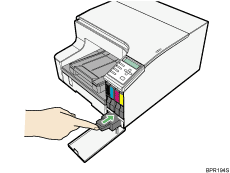
Wait at least five seconds, and then remove the full ink collector unit from the printer.
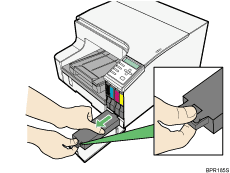
When pulling the unit out, keep the unit level and press on the area marked "Push".
Put the Ink collector unit in the supplied plastic bag.
Insert the new ink collector unit.
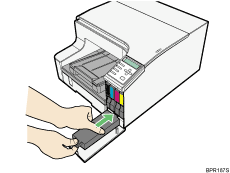
Slide the ink collector unit carefully into the printer, until you hear it click.
Close the right front cover.