Printing
Follow the procedure below to print on plain paper.
![]()
You can load 100 sheets in the optional bypass tray unit.
Curled paper may jam. Straighten any curls within 2 mm (0.08 inches) before loading.
Load paper with the print side face down in the paper trays.
Load paper with the print side face up in the optional bypass tray unit.
When printing on both sides, content other than text is printed at lower density.
If ink smears appear and characters are not properly formed when printing white text on a black background, select [High speed] or [Speed priority] in the [Print Quality] area, and then print the job again.
Printing on envelopes
Before loading envelopes, make sure their edges are sharply creased by rubbing the edges with a pen or similar object.
Squeeze the paper guide release, and then slide the paper guides into position according to the paper size.

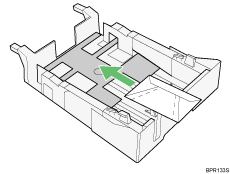
![]() Load plain paper into tray.
Load plain paper into tray.
How to load paper depends on the paper type.
![]() Open the printer properties dialog box from the application.
Open the printer properties dialog box from the application.
![]() Select the paper type from the [Paper type:] list.
Select the paper type from the [Paper type:] list.
After selecting the paper type as required, switch the envelope selector to "![]() ".
".
If you select [Inkjet Plain Paper], the machine will print on one side only. To print on both sides, select [Plain].
![]() Make the necessary settings, and then click [OK].
Make the necessary settings, and then click [OK].
The printer properties dialog box closes.
![]() Make print settings, and then click [OK].
Make print settings, and then click [OK].
![]()
Loadable paper sizes, quantities, and paper types vary according to each paper tray.
If you set [Paper Type:] to [Glossy Paper] in the printer properties dialog box, be sure to remove each sheet as it is delivered to the output ramp.
You can load up to 20 envelopes.
![]()
For details about loadable paper sizes and quantities, see Loadable Paper Sizes and Quantities
 .
.

