Plugging in the Power Cord and Turning the Power On
Before connecting the printer to a computer, connect the printer's power cord and switch the printer on.
![]()
|
![]()
Do not handle the machine while the cartridge is being filled. Ink filling begins when the machine's power is switched on. Until the “Loading Ink...” message disappears from the control panel.
Remove the orange tape from around the power cord.
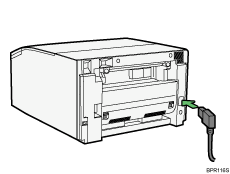
Plug the power cord fully into the printer.

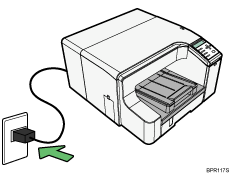
Plug the power cord fully into the wall outlet.

The surface should be level within two degrees.
Make sure the power cord is not trapped under the printer.
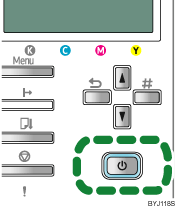
Press the [Power] key.

The printer starts feeding ink into its print heads (taking approximately 6 minutes).
Make sure the “Ready” message is displayed on the control panel.
Do not switch off the power of the machine during this period. Make sure the plug is not removed from the wall outlet.
You might hear a clicking sound while the print heads are filling. This is not a malfunction. It will stop after a while.

