Programming Initial Set Up of a Special Sender
This section describes how to program Initial Set Up of a Special Sender.
Program the “Initial Set Up” of a Special Sender. You can also specify the Bypass Tray Paper Size.
![]() Press [Facsimile Features].
Press [Facsimile Features].
![]() Press [Reception Settings].
Press [Reception Settings].
![]() Press [Program Special Sender].
Press [Program Special Sender].
![]() Press [Initial Set Up].
Press [Initial Set Up].
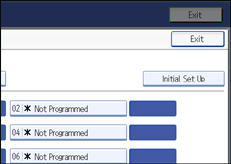
![]() Select the function you want to program.
Select the function you want to program.
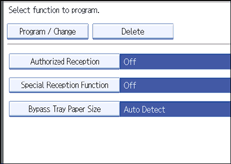
![]() To program Authorized Reception and Special Reception Function, press [Authorized Reception] or [Special Reception Function].
To program Authorized Reception and Special Reception Function, press [Authorized Reception] or [Special Reception Function].
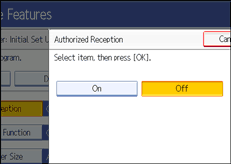
![]() Press [On] or [Off], and then press [OK].
Press [On] or [Off], and then press [OK].
The illustration shows the “Authorized Reception” display as an example.
![]() To program Bypass Tray Paper Size, press [Bypass Tray Paper Size].
To program Bypass Tray Paper Size, press [Bypass Tray Paper Size].
You can select a size from [Auto Detect], [Regular Size], or [Custom Size].
If you select [Auto Detect], proceed to steps 9 and 14.
If you select [Regular Size], proceed to steps 9, 10 and 14.
If you select [Custom Size], proceed to steps 9 and 11 to 14.
![]() Select the size you want to program.
Select the size you want to program.
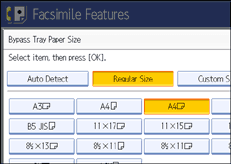
If you select [Regular Size], select a paper size displayed, and then proceed to step 14.
If you select [Custom Size], proceed to step 11.
![]() Select the size you want to program from the sizes shown.
Select the size you want to program from the sizes shown.
![]() Make sure that [Vertical] is selected.
Make sure that [Vertical] is selected.
![]() Enter the vertical size of the paper using the number keys, and then press the [
Enter the vertical size of the paper using the number keys, and then press the [![]() ] key.
] key.
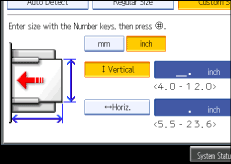
Specify a vertical size from 100 mm (4.0") to 305 mm (12.0").
Each time you press [mm] or [inch], the units switch between “mm” and “inch”.
If you enter a length and change the units by pressing [mm] or [inch], it is converted automatically (fractions are rounded off).
![]() Enter the horizontal size of the paper using the number keys, and then press the [
Enter the horizontal size of the paper using the number keys, and then press the [![]() ] key.
] key.
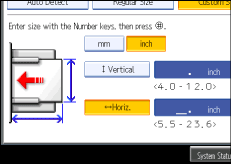
Specify a horizontal size from 140 mm (5.5") to 600 mm (23.6").
Each time you press [mm] or [inch], the units switch between “mm” and “inch”.
If you enter a length and change the units by pressing [mm] or [inch], it is converted automatically (fractions are rounded off).
![]() Press [OK].
Press [OK].
![]() Press [Exit].
Press [Exit].
![]() Press the [User Tools/Counter] key.
Press the [User Tools/Counter] key.
![]()
If you select [Auto Detect], the machine recognizes the paper size automatically.
The size of sheets you can set onto from the bypass tray varies depending on whether or not a finisher is installed and the model of the finisher.
Finisher not installed: 100 - 305 mm (3.9 - 12 inches) vertical length; 139.7 - 600 mm (5.5 - 23.6 inches) horizontal length.
Finisher SR4030 or SR4040 installed: 100 - 305 mm (3.9 - 12 inches) vertical length; 139.7 - 487.6 mm (5.5 - 19.2 inches) horizontal length.
Finisher SR4050 installed: 100 - 305 mm (3.9 - 12 inches) vertical length; 139.7 - 458 mm (5.5 - 18 inches) horizontal length.

