Using Job Preset in Connect Copy
You can make settings for the next Connect Copy job when the current job is still in progress on the main machine.
When the current job finishes, the next job begins automatically.
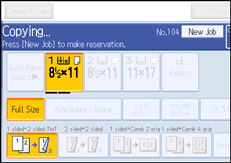
![]() On the main machine, confirm that “Press [New Job] to make reservation.” is displayed, and then press [New Job].
On the main machine, confirm that “Press [New Job] to make reservation.” is displayed, and then press [New Job].

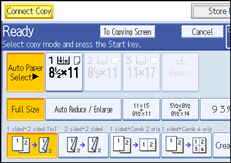
![]() Confirm that “Ready” is displayed, and then press [Connect Copy].
Confirm that “Ready” is displayed, and then press [Connect Copy].
![]() Place the originals in the main machine.
Place the originals in the main machine.
![]() Confirm that “Ready” is displayed, and then make settings for the job.
Confirm that “Ready” is displayed, and then make settings for the job.

![]() Press the [Start] key on the main machine.
Press the [Start] key on the main machine.
Scanning begins. As soon as the current job is finished, the next job starts automatically.
![]()
You can preset a maximum of eight jobs.
When placing originals on the exposure glass, press the [
 ] key after all originals have been scanned.
When placing multiple originals in the ADF, wait till the first original sets have been fed before placing the next.
Preset jobs in Connect Copy mode can only be changed when the main machine has finished scanning the originals.
Preset jobs in Connect Copy mode can only be changed when copying has yet to begin on either machine.

