Using Connect Copy
You can select Connect Copy from either machine by pressing [Connect Copy].
The machine on which you pressed [Connect Copy] and made Connect Copy settings becomes the main machine, and the other the sub-machine.
![]()
When User Code Authentication is set, enter your user code (up to eight digits) with the number keys so that the machine accepts copy jobs. For details about Administrator Tools, see “System Settings”, Network and System Settings Guide
 .
.When Basic Authentication, Windows Authentication, LDAP Authentication, or Integration Server Authentication is set, enter your login user name and password so that the machine accepts copy jobs. Ask the administrator for the login user name and password. For details, see “When the Authentication Screen is Displayed”, About This Machine

 .
.In Connect Copy mode, use the main machine to perform this function.
![]() Make sure “Ready” appears on the screen.
Make sure “Ready” appears on the screen.

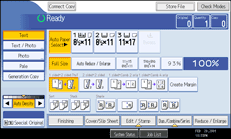
![]() Press [Connect Copy] on the machine that you want to use as the main.
Press [Connect Copy] on the machine that you want to use as the main.
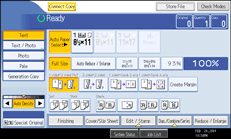
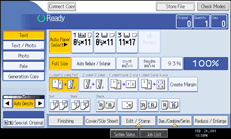
[Connect Copy] becomes highlighted, and the two machines are connected.
Main machine

Sub-machine

![]() Set the originals on the main machine.
Set the originals on the main machine.
![]() Make the necessary settings using the main machine.
Make the necessary settings using the main machine.
If you have made any copy settings before using Connect Copy, the settings remain effective. However, if the Finisher SR4030, SR4050 or Booklet Finisher SR4040, and Multi-Folding Unit are not installed on either one of the two, the Stack, Staple, Punch, Z-fold, Half Fold, Letter Fold-in, Letter Fold-out, Double Parallel Fold and Gate Fold functions are automatically disabled.
![]() Enter the number of copies with the number keys.
Enter the number of copies with the number keys.
The maximum copy quantity that can be set is 999.
![]() Press the [Start] key on the main machine.
Press the [Start] key on the main machine.
Copying starts if the main machine is not in use. The sub-machine starts copying after data transfer from the main machine is completed.
![]() Collect your copies from both the main and sub machines.
Collect your copies from both the main and sub machines.
![]()
To cancel Connect Copy mode, press [Connect Copy], which is highlighted on the main machine.
Since the sub-machine starts copying after receiving data from the main machine, the numbers of copy sets differ on the main and sub machines. The difference between the number of copies made by the main machine and the number made by the sub-machine will increase in proportion to the quantity of data being transferred.
Both machines may not finish copying at the same time.
When the number of originals or copies is small, copying will be done on only the main machine.
When using the Sort/Staple function, copying is divided between the two machines by the number of sets. If a paper misfeed occurs when processing a set of copes, it is not possible for the other machine to take over the remainder of that particular set.
When placing originals on the exposure glass, or in the ADF using Batch mode, press the [
 ] key after all the originals have been scanned.
To interrupt ADF scanning, press the [Clear/Stop] key on the main machine, and then select [Stop].
To stop copying, press the [Clear/Stop] key on the main machine, and then select [Stop].
To specify whether or not to display [Connect Copy], set “Connect Copy Key Display” under “General Features”. For details, see “General Features”.
When the memory to store originals exceeds the maximum, an error message appears. For details, see “When Memory is Full”, Troubleshooting

 .
.When placing multiple originals in the ADF using Batch mode, wait till an original has been fed before placing the next.

