

  |  | ||
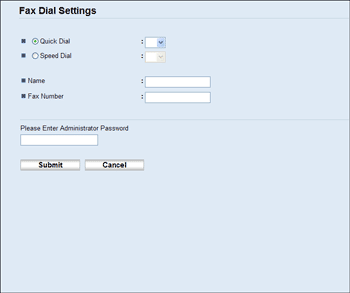
This section describes how to register destinations using Web Image Monitor.
Start the Web browser and access the machine by entering its IP address.
Click [One Touch Button] or [Fax Speed Dial].
From the [Add New Type] list, select [Fax].
Select [Quick Dial] or [Speed Dial], and then select the registration number from the list.
Register [Name] and [Fax Number] as necessary.
Enter the administrator password if required.
Click [Submit].
Close the Web browser.
Fax destination settings

Item |
Setting |
Description |
|---|---|---|
Quick Dial / Speed Dial |
Required |
Select the number to which you want to register Quick Dial or Speed Dial destination. |
Name |
Optional |
Name of the destination. The name specified here will be shown on the screen when selecting a fax destination. Can contain up to 20 characters. |
Fax Number |
Required |
Fax number of the destination. Can contain up to 40 characters. |
![]()
A fax number can contain 0 to 9, pause, "![]() ", "
", "![]() ", and space.
", and space.
If necessary, insert a pause in a fax number. The machine pauses briefly before it dials the digits following the pause. You can specify the length of the pause time in the [Pause Key Time] setting under fax transmission settings.
To use tone services on a pulse-dialing line, insert "![]() " in a fax number. "
" in a fax number. "![]() " switches the dialing mode from pulse to tone temporarily.
" switches the dialing mode from pulse to tone temporarily.
![]()
For details about [Pause Key Time], see Fax Transmission Settings.
For details about using Web Image Monitor, see Using Web Image Monitor.