Registering Fax Destinations Using the Control Panel
This section describes how to register destinations using the control panel.
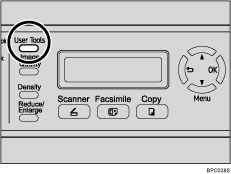
![]() Press the [User Tools] key.
Press the [User Tools] key.

![]() Press the [
Press the [![]() ][
][![]() ] keys to select [Fax Directory], and then press the [OK] key.
] keys to select [Fax Directory], and then press the [OK] key.
![]() If you are requested to enter a password, enter the password using the number keys, and then press the [OK] key.
If you are requested to enter a password, enter the password using the number keys, and then press the [OK] key.
![]() Press the [
Press the [![]() ][
][![]() ] keys to select [Quick Dial Entry] or [Speed Dial Entry], and then press the [OK] key.
] keys to select [Quick Dial Entry] or [Speed Dial Entry], and then press the [OK] key.
![]() Press the [
Press the [![]() ][
][![]() ] keys to select the desired Quick Dial entry number (01 to 20) or Speed Dial entry number (01 to 50), and then press the [OK] key.
] keys to select the desired Quick Dial entry number (01 to 20) or Speed Dial entry number (01 to 50), and then press the [OK] key.
![]() Press the [
Press the [![]() ][
][![]() ] keys to select [Fax # Entry], and then press the [OK] key.
] keys to select [Fax # Entry], and then press the [OK] key.
![]() Enter the fax number (up to 40 characters), and then press the [OK] key.
Enter the fax number (up to 40 characters), and then press the [OK] key.
![]() Press the [
Press the [![]() ][
][![]() ] keys to select [Fax Name Entry], and then press the [OK] key.
] keys to select [Fax Name Entry], and then press the [OK] key.
![]() Enter the name (up to 20 characters), and then press the [OK] key.
Enter the name (up to 20 characters), and then press the [OK] key.
![]() Confirm the setting, and then press the [OK] key.
Confirm the setting, and then press the [OK] key.
![]() Press the [Clear/Stop] key to return to the initial screen.
Press the [Clear/Stop] key to return to the initial screen.
![]()
You can press the [
 ] key to exit to the previous level of the menu tree.
A fax number can contain 0 to 9, pause, "
 ", "
", " ", and space.
If necessary, insert a pause in the fax number. The machine pauses briefly before it dials the digits following the pause. You can specify the length of the pause time in the [Pause Key Time] setting under fax transmission settings.
To use tone services on a pulse-dialing line, insert “
 ” in the fax number. “
 ” switches the dialing mode from pulse to tone temporarily.
A password for accessing the [Fax Directory] menu can be specified in [Admin Menu Lock].
![]()
For details about entering characters, see Entering Characters
 .
.For details about [Pause Key Time], see Fax Transmission Settings
 .
.For details about [Admin Menu Lock], see Administrator Settings
 .
.

