Basic Operation for Sending Scanned Files
This section describes the basic operation for scanning using the control panel. The scanned file is sent via E-mail, to an FTP server, or a computer, depending on the specified destination.
![]()
The original in the ADF takes precedence over the original on the exposure glass if you place originals both in the ADF and on the exposure glass.
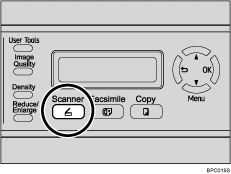
![]() Press the [Scanner] key.
Press the [Scanner] key.

![]() Place the original on the exposure glass or in the ADF.
Place the original on the exposure glass or in the ADF.
If necessary, configure advanced scan settings.
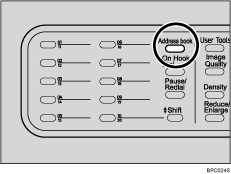
![]() Press the [Address book] key.
Press the [Address book] key.
You can press the [![]() ][
][![]() ] keys to scroll the address book.
] keys to scroll the address book.

![]() Search for the desired destination by entering the destination name using the number keys, and then press the [OK] key.
Search for the desired destination by entering the destination name using the number keys, and then press the [OK] key.
The screen changes to show the names that match the characters you enter.
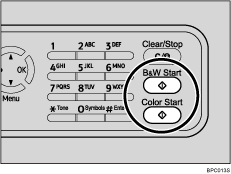
![]() Press the [B&W Start] key or the [Color Start] key.
Press the [B&W Start] key or the [Color Start] key.

To scan in black and white, press the [B&W Start] key.
To scan in color, press the [Color Start] key.
Depending on the machine's settings, you may be prompted to place another original on the exposure glass. In this case, proceed to the next step.
![]() If you have more originals to scan, place the next original on the exposure glass, and then press [1]. Repeat this step until all originals are scanned.
If you have more originals to scan, place the next original on the exposure glass, and then press [1]. Repeat this step until all originals are scanned.
![]() When all originals have been scanned, press [2] to start sending the scanned file.
When all originals have been scanned, press [2] to start sending the scanned file.
![]()
To cancel scanning, press the [Scanner] key, and then press the [Clear/Stop] key. The scan files are discarded.
When you specify a scan destination, the machine's scan settings change automatically according to the information registered for that destination in the Address Book. If necessary, you can change the scan settings using the control panel.
You can also specify a destination using the One Touch buttons or [Pause/Redial] key.
If the [Limitless Scan] setting under scanner settings is enabled, you can place originals on the exposure glass repeatedly in a single scan procedure.
If the [Multi Page in A Document] setting under scanner settings is enabled, you can scan multiple pages to create a single PDF or TIFF file containing all pages. However, if the file format is JPEG, a single-page file will be created for every page scanned.
If paper is jammed in the ADF, the scan file is discarded. In this case, scan the entire originals again. To remove paper jams in the ADF, see Removing Scanning Jams
 .
.
![]()
To place the original, see Placing Originals
 .
.To configure advanced scan settings, see Specifying the Scan Settings
 .
.For details about specifying the scan destination, see Specifying the scan destination
 .
.For details about [Multi Page in A Document] or [Limitless Scan], see Scanner Settings
 .
.For details about how to remove the paper jammed in the ADF, see Removing Scanning Jams
 .
.

