

  |  | ||
Follow the procedure below to set the machine using the control panel when loading custom size paper onto the bypass tray.
![]()
The following procedures are not required if you select [Driver/Command] from [Bypass Tray Priority] in [System] of [Printer Features] (see "Printer Features"). In that case, set the paper size using the printer driver.
If you select [Machine Settings] from [Bypass Tray Priority] in [System] of [Printer Features] (see "Printer Features"), the settings made using the control panel have priority over the printer driver settings.
If the printer driver is not used, select [Machine Settings] from [Bypass Tray Priority] in [System] of [Printer Features] (see "Printer Features"). Set paper size using the control panel.
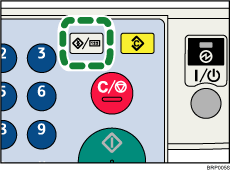
Press the [User Tools/Counter] key on the control panel.

Press the [![]() ] or [
] or [![]() ] key to select [System Settings], and then press the [OK] key.
] key to select [System Settings], and then press the [OK] key.

Press the [![]() ] or [
] or [![]() ] key to select [Tray Paper Settings], and then press the [OK] key.
] key to select [Tray Paper Settings], and then press the [OK] key.

Press the [![]() ] or [
] or [![]() ] key to select [Printer Bypass Paper Size], and then press the [OK] key.
] key to select [Printer Bypass Paper Size], and then press the [OK] key.

Press the [![]() ], [
], [![]() ], [
], [![]() ], or [
], or [![]() ] key to select the [Custom Size], and then press the [OK] key.
] key to select the [Custom Size], and then press the [OK] key.

Enter the horizontal size of the paper using the number keys, and press [OK] key.
![]()

![]()

Enter the vertical size of the paper using the number keys, and press [OK] key.
![]()

![]()

Press the [User Tools/Counter] key to return to the initial screen.
![]()
When loading thick paper, thin paper, or OHP transparencies, set paper size and paper type.
[Auto Detect] is the default setting for [Printer Bypass Paper Size].
For details about setting printer drivers, see the printer driver Help.