


  |  | ||
When copying onto envelopes, specify the paper type and paper size.
![]()
Before loading envelopes, use a pen or similar to flatten their edges.
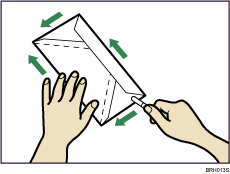
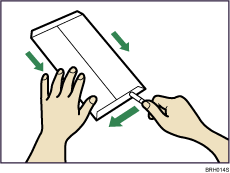
Printable area
The following areas of envelopes can be printed on:
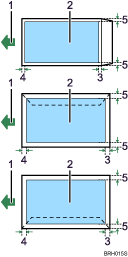
1. Feeding direction
2. Printable area
3. 10 mm (0.4 inches)
4. 10 mm (0.4 inches)
5. 10 mm (0.4 inches)
Orientation of Originals and Envelopes
Originals and envelopes must be placed in the same orientation.
To minimize waste and time, check that originals and envelopes are loaded in the same orientation.

The illustration shows the orientation of originals and envelopes.
1. Original on the exposure glass
2. Envelope on the bypass tray
3. Top
4. Bottom
5. Horizontal size
6. Vertical size
Insert the envelopes with the side you want to copy face down.
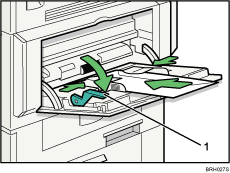
Release lever
Press the [![]() ] key.
] key.
Select [Paper Size] using [![]() ] or [
] or [![]() ], and then press the [OK] key.
], and then press the [OK] key.

Select [Regular Size] using [![]() ] or [
] or [![]() ], and then press the [OK] key.
], and then press the [OK] key.

Select the envelope size using [![]() ] or [
] or [![]() ], and then press the [OK] key.
], and then press the [OK] key.

The "Programmed" message appears.

Press the [![]() ] key.
] key.
Select [Paper Type] using [![]() ] or [
] or [![]() ], and then press the [OK] key.
], and then press the [OK] key.

Select [Thick Paper] using [![]() ] or [
] or [![]() ], and then press the [OK] key.
], and then press the [OK] key.

The "Programmed" message appears.

Place the original, and then press the [Start] key.
When the copy job is finished, press the [Clear Modes] key to clear the settings.
![]()
Load only as many envelopes on the bypass tray as can be stacked up to 10.5 mm (0.4 inches) high. Check the envelopes are not damp. Load only as many envelopes as can be held between the paper guides on the bypass tray.
When copying on a small-sized envelope, align the flap to the paper guide on the left.
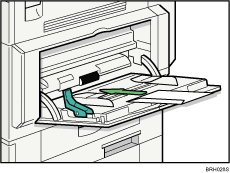
Check there is no air in the envelopes before loading.
To get better print quality, it is recommended that you set the right, left, top, and bottom print margin, to at least 15 mm (0.6 inches) each.
You cannot print envelopes with the Duplex function.
Load only one size and type of envelope at a time.
Before loading envelopes, check they are rectangular in shape.
For details about supported envelope types, see "Envelopes", About This Machine.