Preset Reduce/Enlarge
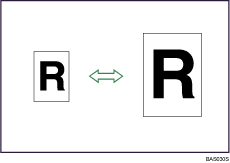
This function allows you to reduce or enlarge images by selecting a preset ratio.

Base Point
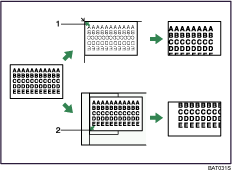
The base point of Reduce/Enlarge differs depending on how the original is scanned. When the original is placed on the exposure glass, the upper left corner will be the base point. When it is placed in the ADF, the bottom left corner will be the base point.
The figure below is the resulting copy images that differ depending on how the original is scanned.

Base point when placed on the exposure glass
Base point when placed in the ADF
![]() Press [R/E].
Press [R/E].

![]() Press [Enlarge] or [Reduce].
Press [Enlarge] or [Reduce].

![]() Select a ratio using [
Select a ratio using [![]() ] or [
] or [![]() ], and then press the [OK] key.
], and then press the [OK] key.
The “Programmed” message appears.
![]() Place your originals, and then press the [Start] key.
Place your originals, and then press the [Start] key.
![]()
You can select one of five preset ratios (two enlargement ratios, three reduction ratios).
Following shows the relation between the original and paper sizes at respective scaling factors.
Metric version
200% (Area ratio 4 times): A6
 A4
A4141% (Area ratio 2 times): A5
 A4
A493%: -
71% (Area ratio 1/2 times): A4
 A5
A550% (Area ratio 1/4 times): A4
 A6
A6Inch version
155% (Area ratio 2 times): 51/2 × 81/2
 81/2 × 14
129%: 51/2 × 81/2
 81/2 × 11
93%: -
78%: 81/2 × 14
 81/2 × 11
65%: 81/2 × 11
 51/2 × 81/2
You can select a ratio regardless of the size of an original or copy paper. With some ratios, parts of the image might not be copied or margins will appear on copies.
You can change reproduction ratios shown on the initial display under Reproduction Ratio in User Tools. For details about Reproduction Ratio, see “User Tools Menu”.

