


  |  | ||
![]()
Before beginning work, ground yourself by touching something metal to discharge any static electricity. Static electricity can damage the board.
Do not subject the board to physical shocks.
The printer's Ethernet port is not available when the Gigabit Ethernet board is attached to the printer. Use the Ethernet port on the Gigabit Ethernet board.
When installing the Gigabit Ethernet board and wireless LAN interface board together, install the Gigabit Ethernet board first, and then install the wireless LAN interface board. If the wireless LAN interface board is already installed, remove it before installing the Gigabit Ethernet board.
Check the contents of the package.

Gigabit Ethernet Board
One Protective Cap
Two Ferrite Cores
Use the included ferrite cores when connecting an Ethernet cable to the board.
Two coin screws
Turn the printer off and unplug the power cord.
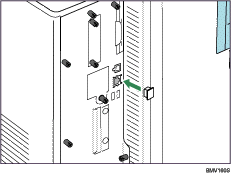
Unplug the cable from the Ethernet port, and then cover it with the protective cap.
Loosen the screw and remove the slot cover.
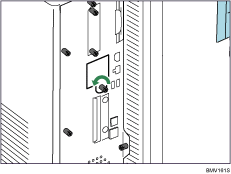
The removed cover will not be reused.
Remove the 5 screws securing the controller board.
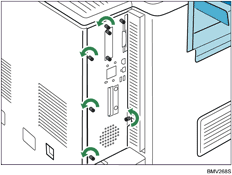
The removed screws will be used to secure the controller board again later.
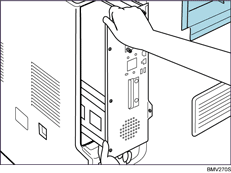
Holding the handle, carefully pull out the controller board.
Slide the controller board completely out, and then place it on a flat surface such as a table.
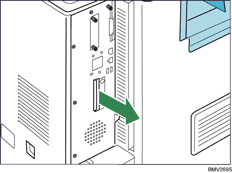
Use both hands to slide the controller board completely out.
Install the Gigabit Ethernet board in the indicated position.
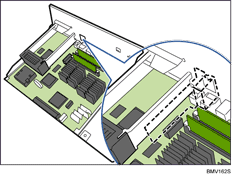
Install the hard disk carefully if the SDRAM module is already installed. If the hard disk comes in contact with the SDRAM module, the SDRAM module may become damaged.
Carefully insert the Gigabit Ethernet board vertically, all the way to the back.
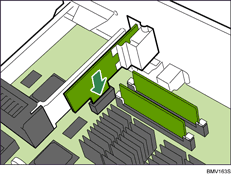
Push the Gigabit Ethernet board all the way to the back, and confirm that it is securely connected to the controller board.
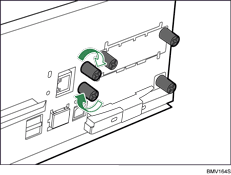
Use 2 coin screws to fasten the Gigabit Ethernet board to the controller board panel.
Fit the controller board into the printer, and push it carefully until it stops.
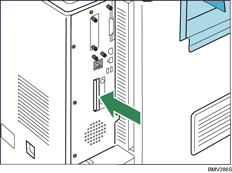
Push it firmly into the printer using the handle. The printer may malfunction if the controller board is not properly installed.
Fasten the controller board to the printer using the five screws.
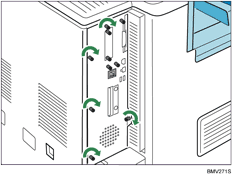
![]()
Confirm that the board was correctly installed by printing the configuration page. If it is correctly installed, "Gigabit Ethernet Board" will appear for "Device Connection" on the configuration page.
If the board was not installed properly, repeat the procedure from the beginning. If it cannot be installed correctly even after reattempting installation, contact your sales or service representative.
For information on printing the configuration page, see "List/Test Print Menu", Software Guide.
Before using the board, you must configure settings from the control panel. For details, see "Ethernet Configuration".