When the 2 Tray Finisher is Installed
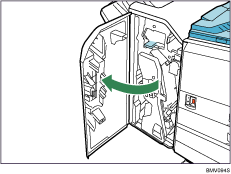
![]() Open the front cover of the finisher.
Open the front cover of the finisher.
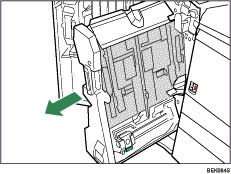
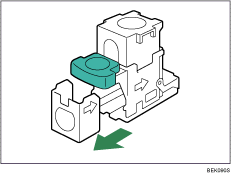
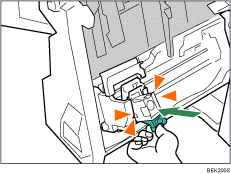
![]() Holding the lever, pull out the staple unit.
Holding the lever, pull out the staple unit.
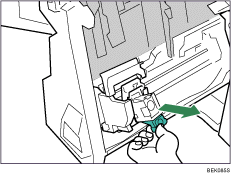
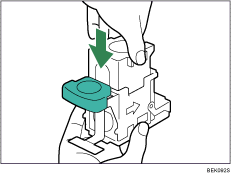
![]() Hold and lift the lever on the cartridge and pull the cartridge gently out of the staple unit.
Hold and lift the lever on the cartridge and pull the cartridge gently out of the staple unit.
![]() Pushing both sides of the cartridge, pull out the upper unit.
Pushing both sides of the cartridge, pull out the upper unit.
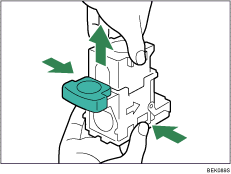
![]() Take out the empty staple case.
Take out the empty staple case.
![]() Push the new case into the cartridge until it clicks.
Push the new case into the cartridge until it clicks.
![]() Lower the upper unit carefully.
Lower the upper unit carefully.
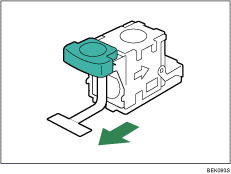
![]() Pull the ribbon out of the staple case that you attached.
Pull the ribbon out of the staple case that you attached.
The ribbon rolls around the staple case. Make sure to pull it out completely.
![]() Holding the lever on the cartridge, push the cartridge down gently into the staple unit until it clicks.
Holding the lever on the cartridge, push the cartridge down gently into the staple unit until it clicks.
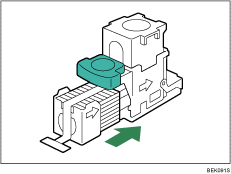
![]() Return the staple unit to its original position.
Return the staple unit to its original position.
![]() Close the front cover of the finisher.
Close the front cover of the finisher.
![]()
If you cannot pull out the upper unit, there are staples remaining inside the cartridge. Use all the staples before replacing the cartridge.