Specifying a paper type for Tray 1 and the optional paper feed unit
Improve printer performance by selecting the optimum paper type for the tray. You can select from the following paper types:
Plain Paper, Recycled Paper, Special Paper, Color Paper, Letterhead, Preprinted, Thick Paper
You can select custom paper type settings made using Web Image Monitor.
![]()
Be sure to set a paper type using the control panel of the printer as the following procedure. If you set a paper type only by the printer driver, printing result might not be appropriate.
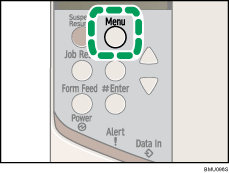
![]() Press the [Menu] key.
Press the [Menu] key.

The [Menu] screen appears.
![]() Press the [
Press the [![]() ] or [
] or [![]() ] key to display [Paper Input], and then press the [
] key to display [Paper Input], and then press the [![]() Enter] key.
Enter] key.

![]() Press the [
Press the [![]() ] or [
] or [![]() ] key to display [Paper Type], and then press the [
] key to display [Paper Type], and then press the [![]() Enter] key.
Enter] key.
![]() Press the [
Press the [![]() ] or [
] or [![]() ] key to select the tray, and then press the [
] key to select the tray, and then press the [![]() Enter] key.
Enter] key.

![]() Press the [
Press the [![]() ] or [
] or [![]() ] key to select the paper type, and then press the [
] key to select the paper type, and then press the [![]() Enter] key.
Enter] key.

![]() Press the [Menu] key.
Press the [Menu] key.
The initial screen appears.
![]()
The following paper types cannot be printed on both sides:
Special Paper, Color Paper, Preprinted, Thick Paper

