
| |||
If the error message is still displayed, check the inside of the fusing unit and remove any paper inside. Turn off the power and wait for about an hour before turning it back on.
![]()
Do not touch the metal part of the fusing unit. It becomes very hot. Touching it could result in a burn.
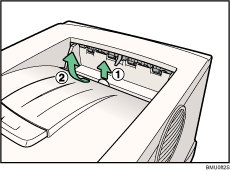
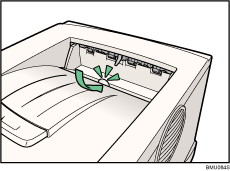
Open the paper exit cover.
Place your finger under the indentation in the exit cover, raise it (![]() ) and pull it backward to open it (
) and pull it backward to open it (![]() ).
).
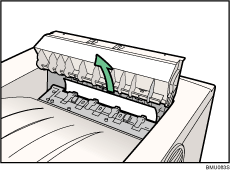
Remove the misfed paper.
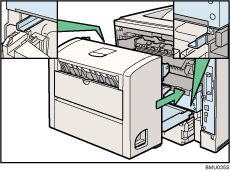
Open the rear cover.
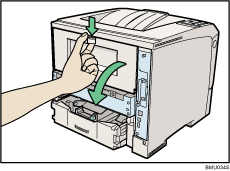
Lower the rear cover until it is horizontal, and then pull it away.
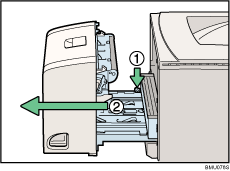
If the optional duplex unit is attached, push down the lever on the right side of the duplex unit (![]() ), and then pull it out until it stops (
), and then pull it out until it stops (![]() ).
).

Push the under board levers (![]() ) and then pull the duplex unit out of the printer (
) and then pull the duplex unit out of the printer (![]() ).
).
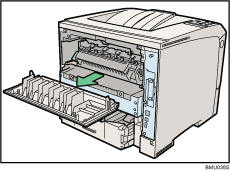
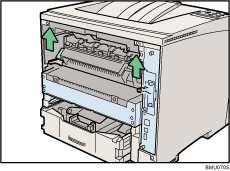
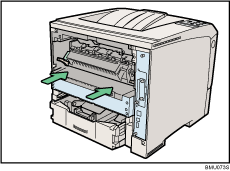
Lift the lock levers of the fusing unit as shown in the illustration.
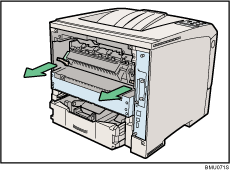
Pull the fusing unit out.
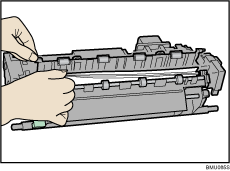
Hold the tab, and then remove the misfed paper.
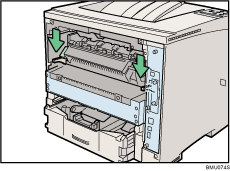
Push the fusing unit until it stops.
Push the lock levers of the fusing unit down until they click.
Proceed to step 13 if the optional duplex unit is installed.
Position the rear cover horizontally and align it with the grooves in the printer's interior.

Close the rear cover.

When the optional duplex unit was removed, push in the duplex unit along the rail in the back of the printer.
Securely push the duplex unit into the printer.

Close the paper exit cover until it clicks.
Turn the power on.
| Copyright (C) 2008 |