
| |||
In the case of using WPA on a network, activate the WPA setting to be used for communication along with WPA. Consult your network administrator for information about making authentication settings.
Press the [Menu] key.
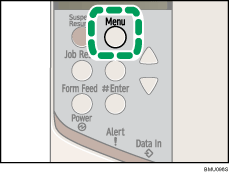
The [Menu] screen appears.
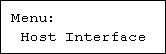
Press the [![]() ] or [
] or [![]() ] key to display [Host Interface], and then press the [
] key to display [Host Interface], and then press the [![]() Enter] key.
Enter] key.
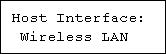
Press the [![]() ] or [
] or [![]() ] key to display [Wireless LAN], and then press the [
] key to display [Wireless LAN], and then press the [![]() Enter] key.
Enter] key.
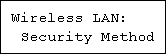
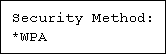
Press the [![]() ] or [
] or [![]() ] key to display [Security Method], and then press the [
] key to display [Security Method], and then press the [![]() Enter] key.
Enter] key.
Press the [![]() ] or [
] or [![]() ] key to display [WPA], and then press the [
] key to display [WPA], and then press the [![]() Enter] key.
Enter] key.
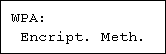
Press the [![]() ] or [
] or [![]() ] key to display [Encrypt. Meth.], and then press the [
] key to display [Encrypt. Meth.], and then press the [![]() Enter] key.
Enter] key.
Press the [![]() ] or [
] or [![]() ] key to select encryption method, and then press the [
] key to select encryption method, and then press the [![]() Enter] key.
Enter] key.
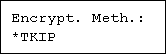
Consult your network administrator for information about making encryption settings.
Encryption settings are as follows:
TKIP
Uses the same algorithm as RC4, but further reduces vulnerability using methods such as key mixing.
CCMP(AES)
Increases security using AES (Advanced Encryption Standard).
Wait for two seconds. The display returns to the [WPA] menu.
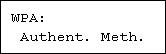
Press the [![]() ] or [
] or [![]() ] key to display [Authent. Meth.], and then press the [
] key to display [Authent. Meth.], and then press the [![]() Enter] key.
Enter] key.
Press the [![]() ] or [
] or [![]() ] key to select authentication method, and then press the [
] key to select authentication method, and then press the [![]() Enter] key.
Enter] key.
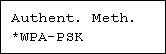
Authentication settings are as follows:
WPA-PSK
Performs authentication using an encryption key (a Pre-Shared Key) that is shared by the access point and client. Enter the Pre-Shared Key using between 8 and 63 ASCII characters. Select [PSK Entry] using the [![]() ] or [
] or [![]() ] key in the [WPA] menu, and then enter the characters.
] key in the [WPA] menu, and then enter the characters.
WPA
WPA uses CA certificates and a RADIUS server to provide secure wireless communication.
WPA2-PSK
As with WPA-PSK, authenticate using the encryption key (a Pre-Shared Key)shared by the access point and client. Enter the Pre-Shared Key using between 8 and 63 ASCII characters.
WPA2
WPA2 is an expanded version of WPA that fully supports IEEE802.11i.
Wait for 2 seconds, the display returns to the [WPA] menu.
Press the [Menu] key.
The initial screen appears.
Print a configuration page to confirm the settings made.
![]()
"Printing the Test Page", Quick Installation Guide
| Copyright (C) 2008 |