


  |  | ||
![]()
Before touching the memory unit, ground yourself by touching something metal to discharge any static electricity. Static electricity can damage the memory unit.
Do not subject the memory unit to physical shocks.
The printer comes equipped with 256 MB of memory. This can be expanded to a maximum of 512 MB.
Before using the new memory unit, be sure to make settings in the printer driver.
Turn off the power of the printer, and then unplug the power cable and interface cable.
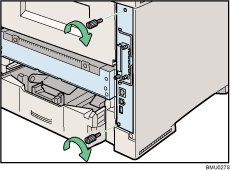
Remove the two screws holding the controller board in place.
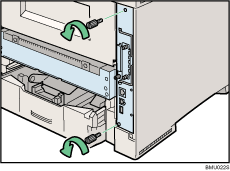
The removed screws are required in fastening the controller board.
Pull out the handle of the controller board.
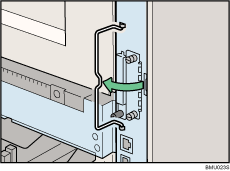
Pull the handle, and then slide the controller board out.
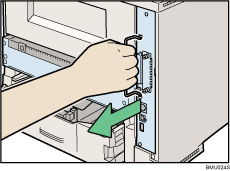
Place the controller board on a flat surface.
The Memory Unit is installed in the slot shown in the illustration below.
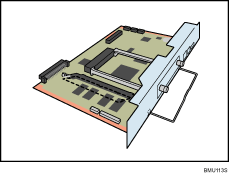
Align the notch on the SDRAM module with the slot, and then carefully push in the SDRAM module at an angle.
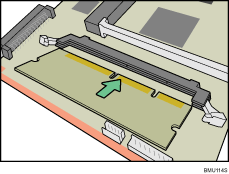
Holding the SDRAM module at an angle, press it down until it clicks into place.
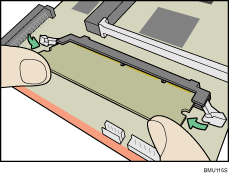
Match the controller board to the top and bottom rail using the "![]() " mark, and then slide it into the printer slowly until it stops.
" mark, and then slide it into the printer slowly until it stops.
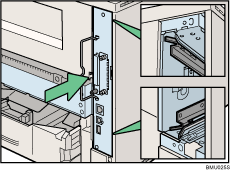
Push the handle of the controller board until it clicks.
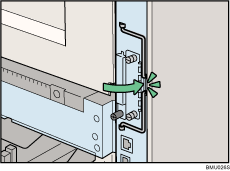
Fasten the controller board to the printer with the two screws.
![]()
Use a coin or similar object if the screws do not turn easily.
After finishing the installation, you can check the memory unit is properly installed: Print the configuration page from the [List/Test Print] menu. If it is installed properly, the memory capacity will appear under "Total Memory" on the configuration page.
The table below shows the total SDRAM module capacities.
Standard |
Extended |
Total |
|---|---|---|
256 MB |
128 MB |
384 MB |
256 MB |
256 MB |
512 MB |
If the memory unit is not properly installed, repeat this procedure. If you cannot install it properly even after reinstallation, contact your sales or service representative.
Install the controller board carefully to prevent any malfunction.
![]()
"Printing the Test Page", Quick Installation Guide.