

  |  | ||
This section describes how to specify the scanning size according to the size of the original for the current job.
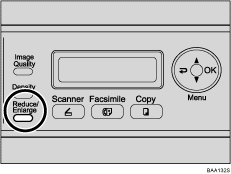
Press the [Reduce/Enlarge] key.

Press the [Reduce/Enlarge] key or [![]() ][
][![]() ] keys to select the size of the original, and then press the [OK] key.
] keys to select the size of the original, and then press the [OK] key.
If you selected anything other than [Custom], you do not need to perform the remaining steps of the procedure.
Press the [![]() ][
][![]() ] keys to select [mm] or [Inch], and then press the [OK] key.
] keys to select [mm] or [Inch], and then press the [OK] key.
Enter the horizontal value using the number keys, and then press the [OK] key.
You can press the [![]() ][
][![]() ] keys to change the value in 1 mm or 0.1 inch increments.
] keys to change the value in 1 mm or 0.1 inch increments.
Confirm the setting, and then press the [OK] key.
Enter the vertical value using the number keys, and then press the [OK] key.
You can press the [![]() ][
][![]() ] keys to change the value in 1 mm or 0.1 inch increments.
] keys to change the value in 1 mm or 0.1 inch increments.
![]()
Use the following keys to cancel settings:
[![]() ]: Cancels the changes made to settings and returns the display to the previous screen.
]: Cancels the changes made to settings and returns the display to the previous screen.
[Clear/Stop]: Cancels the changes made to settings and returns the display to the initial screen.
You can change the [Document Size] setting under [Scan Settings] to always scan originals with a specific scanning size.
Temporary job settings are cleared in the following cases:
When no input is received for the period of time specified in [Auto Clear] while the initial screen is displayed.
When the [Clear/Stop] key is pressed while the initial screen is displayed.
When the machine's mode is changed.
When the power is turned off.
When the machine's default for the same setting is changed.
![]()
For details about [Document Size], see Scanner Settings.
For details about [Auto Clear], see Administrator Settings.