Replacing the Maintenance Kit
![]()
|
![]()
|
When to replace the maintenance kit
If the Alert indicator on the control panel lights up and the following message appears on the display, replace the fusing unit and the transcription roller:
“Replace Fusing Unit”
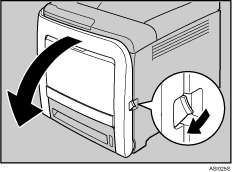
![]() Pull Front Cover Open Lever, and then open the front cover with both hands carefully.
Pull Front Cover Open Lever, and then open the front cover with both hands carefully.
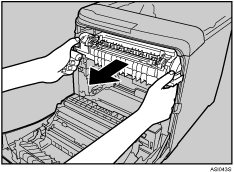
![]() Hold the levers on both sides of the fusing unit and carefully pull it out.
Hold the levers on both sides of the fusing unit and carefully pull it out.
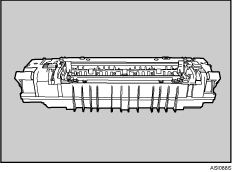
Place the old fusing unit on a flat surface.
![]() Prepare a new fusing unit.
Prepare a new fusing unit.
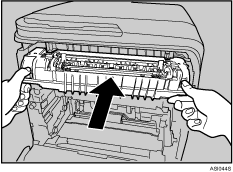
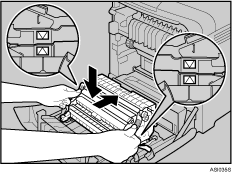
![]() While supporting both ends of the new fusing unit with your forefingers and pressing down the levers with your thumbs, carefully push the unit fully in.
While supporting both ends of the new fusing unit with your forefingers and pressing down the levers with your thumbs, carefully push the unit fully in.
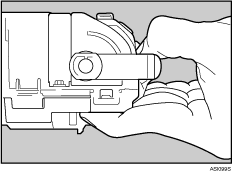
![]() Make sure that the markings on the fusing unit are aligned with the markings on the levers.
Make sure that the markings on the fusing unit are aligned with the markings on the levers.
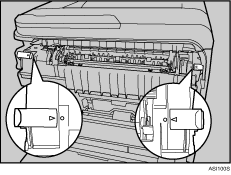
If the markings are misaligned, align them by lowering the levers and once again pushing the fusing unit fully in.
![]() Slide the levers on the front cover outwards.
Slide the levers on the front cover outwards.
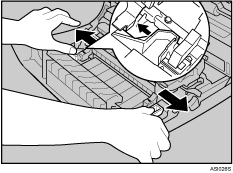
![]() Hold both ends of the transfer unit and lift it up.
Hold both ends of the transfer unit and lift it up.
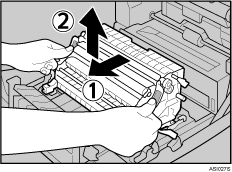
Place the transfer unit on a flat surface.
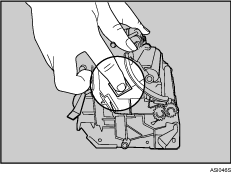
![]() Push the lower right part of the transfer unit.
Push the lower right part of the transfer unit.
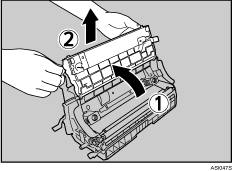
![]() Lift the transcription roller to take it out.
Lift the transcription roller to take it out.
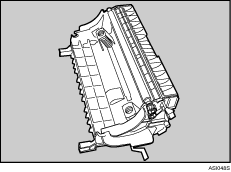
![]() Hold the new transcription roller, and match it with the transcription unit, like the illustration shown below.
Hold the new transcription roller, and match it with the transcription unit, like the illustration shown below.
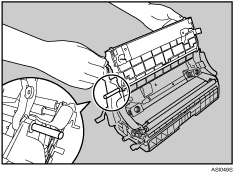
![]() Lift the transcription roller to install it.
Lift the transcription roller to install it.
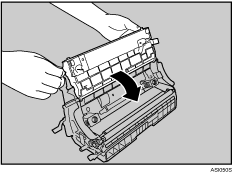
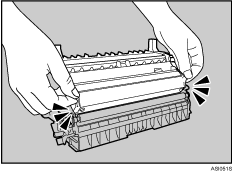
![]() Place the transfer unit down on the front cover.
Place the transfer unit down on the front cover.
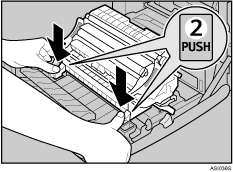
![]() Place the transfer unit on the front cover by aligning the
Place the transfer unit on the front cover by aligning the ![]() mark on the transfer unit with the
mark on the transfer unit with the ![]() mark on the front cover.
mark on the front cover.
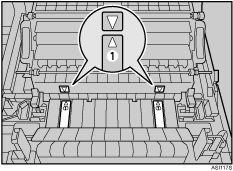
Then, push on the green PUSH marks until the transfer unit clicks into place.
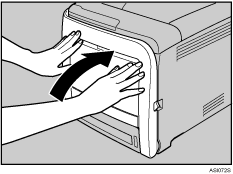
![]() Close the front cover with both hands carefully.
Close the front cover with both hands carefully.
