

  |  | ||
This section explains how to change a name and fax number registered in the Address Book.
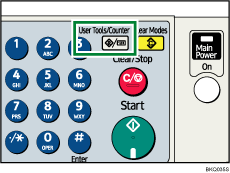
Press the [User Tools/Counter] key.

Select [System Settings] using [![]() ] or [
] or [![]() ], and then press the [OK] key.
], and then press the [OK] key.

Select [Administrator Tools] using [![]() ] or [
] or [![]() ], and then press the [OK] key.
], and then press the [OK] key.

Select [Address Book Management] using [![]() ] or [
] or [![]() ], and then press the [OK] key.
], and then press the [OK] key.

Select [Program/Change] using [![]() ] or [
] or [![]() ], and then press the [OK] key.
], and then press the [OK] key.

Enter the registration number you want to change using the number keys or the Quick Dial keys, and then press the [OK] key.

To specify a destination using a Quick Dial key, press a registration number from 001 to 032.
Enter the new name, and then press the [OK] key.

Press [Details].

Select [Fax Settings] using [![]() ] or [
] or [![]() ], and then press the [OK] key.
], and then press the [OK] key.

Enter the new fax number using the number keys.

Press [Option], and then change the settings of "SUB Code", "SEP Code", and "Label Insertion", as necessary.
After changing the settings, press [Exit], and then press the [OK] key.
Press [End].

Press the [OK] key.

Press the [User Tools/Counter] key.
![]()
For details about the procedure in step 11, see "Registering Addresses and Users for Facsimile Functions", Network and System Settings Guide.