

  |  | ||
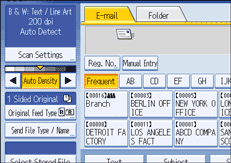
This section explains how to adjust image density.
To adjust image density, press [![]() ] or [
] or [![]() ], at the left and right of [Auto Density]. These buttons increase or decrease the image density in single increments up to 7.
], at the left and right of [Auto Density]. These buttons increase or decrease the image density in single increments up to 7.
Selecting [Auto Density] corrects scanning density to improve resolution of paper types such as non-white paper like newspaper or transparent originals.

![]()
When scanning originals in full color, you can specify the [Auto Density] level in [Background Density of ADS (Full Colour)] under [Scanner Features]. For details, see "Scan Settings".