


  |  | ||
Follow the procedure below to set the machine using the control panel when loading envelopes onto the bypass tray.
![]()
The following procedures are not required if you select [Driver/Command] from [Bypass Tray Setting Priority] in [System] of [Printer Features] (see "System"). In that case, set the paper size using the printer driver.
If you select [Machine Settings] from [Bypass Tray Setting Priority] in [System] of [Printer Features] (see "System"), the settings made using the control panel have priority over the printer driver settings.
If the printer driver is not used, select [Machine Settings] from [Bypass Tray Setting Priority] in [System] of [Printer Features] (see "System"). Set paper size using the control panel.
Envelope types |
Supported/Not supported |
|---|---|
|
Supported |
|
Supported |
|
Supported |
Misfeeds might also occur when using envelopes (1) - (3) depending on the length and shape of the flaps.
You can load up to 10 envelopes (72 - 90g/m2) in the bypass tray at the same time, without compressing them. Check the envelopes are not damp, and the top of the stack is not higher than the limit mark on the side guide.
When loading envelopes, be sure to unfold the flaps and position them opposite to the paper feed direction.
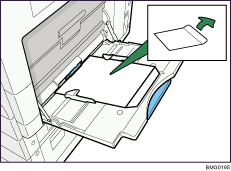
Load type (4) (162 ![]() 114 mm / C6) (6.38 "
114 mm / C6) (6.38 " ![]() 4.49 " / C6) envelopes flap down, flap fold against the side guide.
4.49 " / C6) envelopes flap down, flap fold against the side guide.
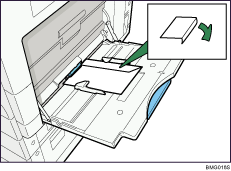
Depending on the envelope type, specify an appropriate print image rotation using the printer driver. For a type (1) - (4) envelope, rotate by specify 180 degrees.
To print on type (4) (custom paper size) envelopes using the RPCS printer driver: in the printer driver's [Paper position in tray] area, specify [Place as portrait]. For details, see the printer driver Help.
Check there is no air in the envelopes before loading.
To get better print quality, it is recommended that you set the right, left, top, and bottom print margin, to at least 15 mm (0.6 in.) each.
You cannot print envelopes with duplex function.
Load only one size and type of envelope at a time.
Before loading envelopes, flatten leading edges (the side going into the machine) by pressing a pencil or ruler across them.
Before loading envelopes, check they are rectangular in shape.
Open the bypass tray, and then insert the envelopes with the side you want to print face-up until the beeper sounds.
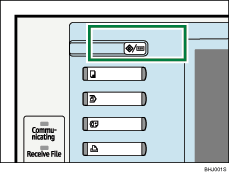
Press the [User Tools/Counter] key on the control panel.
Press [System Settings].
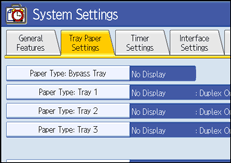
Press the [Tray Paper Settings] tab.
Press [Printer Bypass Paper Size].
Press [Custom Size].
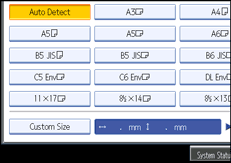
If a custom size is already set, press [Change Size].
Press [Vertical], enter the vertical size of the paper using the number keys, and then press the [![]() ] key.
] key.
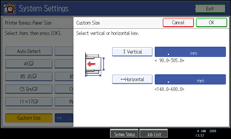
Press [Horizontal], enter the horizontal size of the paper using the number keys, and then press the [![]() ] key.
] key.
Press [OK].
The paper sizes entered are displayed.
Press [OK].
Press [![]() Next] to scroll through the list.
Next] to scroll through the list.
Press [Paper Type: Bypass Tray].
Press [Envelope] on the [Paper Type] area, and then press [Thick Paper 2] on the [Paper Thickness] area.
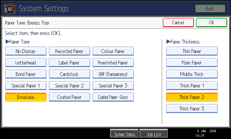
Press [OK].
The paper type selected is displayed.
Press the [User Tools/Counter] key.
The initial screen appears.
![]()
When entering the horizontal size for envelopes, including the opened-out flap in the measurement.
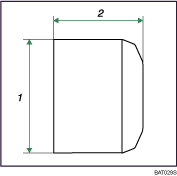
Vertical size
Horizontal size
For details about envelopes, see "Envelope", About This Machine.