Duplex Copying
This section describes how to make duplex copies.
Copies two 1-sided pages or one 2-sided page onto a 2-sided page.
![]()
You cannot use the bypass tray with this function.
1 Sided ![]() 2 Sided
2 Sided
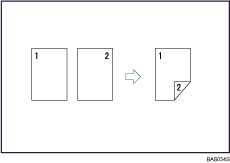
Copies two 1-sided pages on one 2-sided page.
2 Sided ![]() 2 Sided
2 Sided
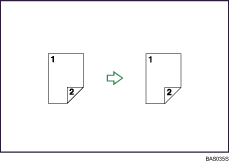
Copies one 2-sided page on one 2-sided page.
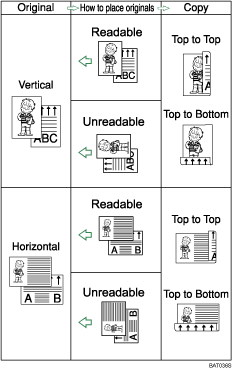
Original orientation and completed copies
The resulting copy image will differ according to the orientation in which you place your originals (![]() or
or ![]() ).
).
The table shows the orientation of images on the front and back of copies, not the orientation of delivery.
![]() Press [Dup./Combine/Series].
Press [Dup./Combine/Series].
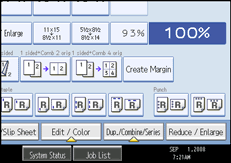
![]() Make sure that [Duplex] is selected. If [Duplex] is not selected, press [Duplex].
Make sure that [Duplex] is selected. If [Duplex] is not selected, press [Duplex].
![]() Select [1 Sided
Select [1 Sided ![]() 2 Sided] or [2 Sided
2 Sided] or [2 Sided ![]() 2 Sided].
2 Sided].
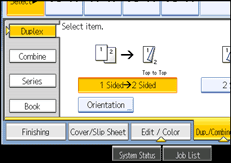
To change the original or copy orientation, press [Orientation].
![]() Press [OK].
Press [OK].
![]() Place the originals, and then press the [Start] key.
Place the originals, and then press the [Start] key.
![]()
When placing an original on the exposure glass, start with the first page to be copied. When placing originals in the ADF, set so that the first page is on the top.
When placing originals on the exposure glass, or in the ADF using Batch mode, press the [
 ] key after all the originals have been scanned.
You can specify the margins under Edit in User Tools. For details about Edit, see “Edit”.
You can use the following copy paper with this function:
A3
 , B4 JIS
 , A4
, A4
 , B5 JIS
 , A5
, A5 , 11 × 17
 , 81/2 × 14
 , 81/2 × 13
 , 81/2 × 11
 , 81/4 × 14
 , 81/4 × 13
 , 8 × 13
 , 8 × 10
 , 71/4 × 101/2
 , 8K
, 8K , 16K
, 16K
 , 11 × 15
 , 10 × 14
You cannot use the following copy paper with this function:
Paper smaller than A5, 51/2 × 81/2
Translucent paper
Label paper (adhesive labels)
OHP transparencies
Paper thicker than 105 g/m2, 28 lb.
Paper thinner than 60 g/m2, 16 lb.
Postcards
Back copied paper
Coated Paper: Gloss Print
Envelope
Coated Paper
When an odd number of originals are placed in the ADF, the back of the last page of copied paper is blank.
During copying, the image is shifted to allow for the binding margin.
By default, a binding margin is made on the back side.

