

  |  | ||
The following procedure describes adjusting the gradation correction value.
During printing, you can correct the gradation in two areas: bright part (highlight) and the medium (middle). The correction value for the highlight and the medium parts are set using [Print Sheet 1] and [Print Sheet 2] respectively.
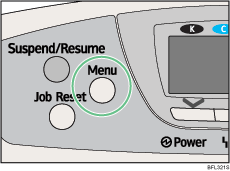
Press the [Menu] key.

Press the [![]() ] or [
] or [![]() ] key to select [Maintenance], and then press the [OK] key.
] key to select [Maintenance], and then press the [OK] key.

Press the [![]() ] or [
] or [![]() ] key to select [Quality Maintenance], and then press the [OK] key.
] key to select [Quality Maintenance], and then press the [OK] key.

Press the [![]() ] or [
] or [![]() ] key to select [Colour Calibration], and then press the [OK] key.
] key to select [Colour Calibration], and then press the [OK] key.

If you want to perform only auto color adjusting, press the [![]() ] or [
] or [![]() ] key select [Adjust Auto Density], and then press the [OK] key.
] key select [Adjust Auto Density], and then press the [OK] key.

The confirmation message appears. Press [OK] to adjust Auto Density.
The confirmation message appears when complete. Press [Exit].
The display returns to the Color Calibration screen.
In the Color Calibration menu, press the [![]() ] or [
] or [![]() ] key to select [Print Sheet 1] or [Print Sheet 2], and then press the [OK] key.
] key to select [Print Sheet 1] or [Print Sheet 2], and then press the [OK] key.

The confirmation message appears. press [Print].
When the selected sheet is printed, the confirmation message appears. Press [Continue].

If you want to exit from this menu, press [Exit].
Press the [![]() ] or [
] or [![]() ] key to select the color you want to adjust, and then press the [OK] key.
] key to select the color you want to adjust, and then press the [OK] key.

Press the [![]() ] or [
] or [![]() ] key to adjust the correction value for the selected color, and then press the [OK] key.
] key to adjust the correction value for the selected color, and then press the [OK] key.

Press [Result].

Press [Print] to check the result by printing the calibration sheet.
After printing, press [Yes] to save the settings.

After completing all settings, press the [Menu] key to return to the initial screen.