Replacing the Intermediate Transfer Unit
![]()
The inside of this printer becomes very hot. Do not touch parts labelled "
 " (indicating a hot surface). Touching these parts will result in burns.
When to replace the intermediate transfer unit
Replace the intermediate transfer unit if any of the following messages appear on the display:
“Replace IntTrans Unit.”

![]() Turn off the power, and then unplug the power cable.
Turn off the power, and then unplug the power cable.
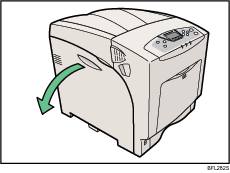
![]() Carefully open the left cover of the printer.
Carefully open the left cover of the printer.
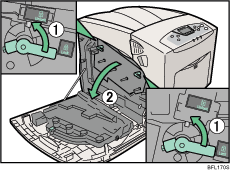
![]() Turn the two green levers of the inner cover anticlockwise (
Turn the two green levers of the inner cover anticlockwise (![]() ), and then slowly open the inner cover (
), and then slowly open the inner cover (![]() ).
).
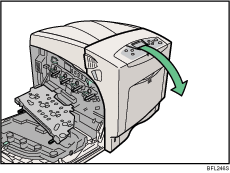
![]() Carefully open the printer's front cover (A) by pulling the left and right side levers.
Carefully open the printer's front cover (A) by pulling the left and right side levers.
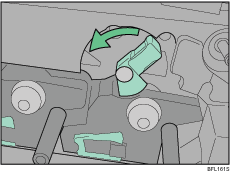
![]() Turn the green lever of the transfer unit counterclockwise to unlock the unit.
Turn the green lever of the transfer unit counterclockwise to unlock the unit.
![]() Pull out the handle of the transfer unit. Grasp the handle and the green lever firmly, and then slowly pull out the transfer unit, until the green line marked on the upper surface of the unit appears.
Pull out the handle of the transfer unit. Grasp the handle and the green lever firmly, and then slowly pull out the transfer unit, until the green line marked on the upper surface of the unit appears.
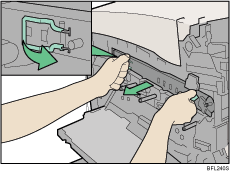
Do not touch any protruding areas on the transfer unit. These may stain your hands or clothes.
![]() When the green line appears, pull up the handles on the upper surface and support the transfer unit with your other hand.
When the green line appears, pull up the handles on the upper surface and support the transfer unit with your other hand.
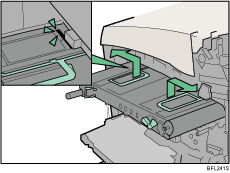
![]() Grasp the raised up handles with both hands, and then pull the transfer unit completely out.
Grasp the raised up handles with both hands, and then pull the transfer unit completely out.
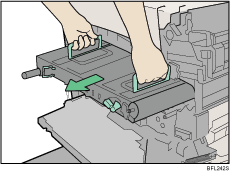
Use both hands and both handles when you pull out the unit.
Do not touch the belt area (underside) of the unit.
![]() Take the new transfer unit out of its box.
Take the new transfer unit out of its box.
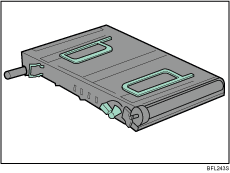
![]() Hold both upper handles, and then slide the transfer unit along the guide rails into the printer.
Hold both upper handles, and then slide the transfer unit along the guide rails into the printer.
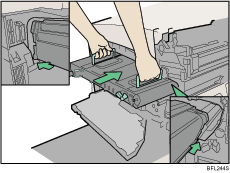
The upper handles must be raised to insert the unit.
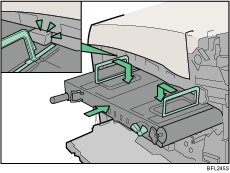
![]() When the upper handles touch the printer body, lower the handles, and then push in the transfer unit, until it stops.
When the upper handles touch the printer body, lower the handles, and then push in the transfer unit, until it stops.
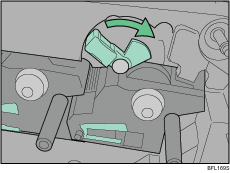
![]() Turn the green lever clockwise to lock the unit.
Turn the green lever clockwise to lock the unit.
![]() Carefully close the front cover (A).
Carefully close the front cover (A).
![]() Close the inner cover. Lock the inner cover by pressing in (
Close the inner cover. Lock the inner cover by pressing in (![]() ) and then turning the two green levers clockwise (
) and then turning the two green levers clockwise (![]() ).
).
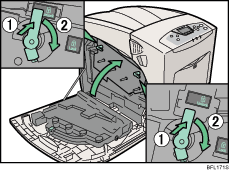
![]() Carefully close the left cover.
Carefully close the left cover.
![]() Plug in the power cable, and then turn on the power.
Plug in the power cable, and then turn on the power.
The printer starts calibration. Wait until it stops.
Wait until “Ready” appears on the display panel.
Do not turn off the power during calibration. Doing so results in malfunction.

