Attaching the Network Interface Board Type GX3
![]()
Before touching the network interface board, ground yourself by touching something metal to discharge any static electricity.
Do not subject the network interface board to impact or other physical stress.
![]() Check the product and its supplied components.
Check the product and its supplied components.
![]() Make sure the printer's power cord is unplugged.
Make sure the printer's power cord is unplugged.
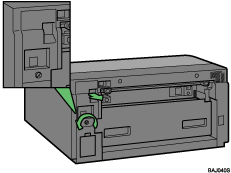
![]() Using a coin, turn the network interface board cover screw counterclockwise, and then remove the cover.
Using a coin, turn the network interface board cover screw counterclockwise, and then remove the cover.
![]() Remove the spacer in the network interface board cover.
Remove the spacer in the network interface board cover.
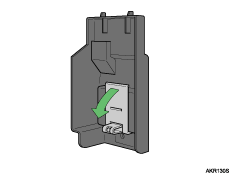
The removed spacer will not be used again.
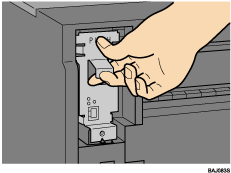
![]() Align the network interface board notch with the triangular mark on the printer, and then push in the network interface board by pressing the part marked “PUSH”.
Align the network interface board notch with the triangular mark on the printer, and then push in the network interface board by pressing the part marked “PUSH”.
![]() Reattach the network interface board cover to the printer, and then secure it with the screw provided.
Reattach the network interface board cover to the printer, and then secure it with the screw provided.
![]()
Be sure to push the network interface board fully into the printer.
If the network interface board is not installed properly, repeat the entire installation procedure. If you cannot install it properly even after attempting reinstallation, contact your sales or service representative.
Dispose of the removed component as general plastic waste or hand it in for collection.