Installing the Printer Driver (USB)
This section explains how to install only the printer driver when the printer is connected to a computer via USB.
If you installed the printer driver by performing Quick Install for USB, there is no need to install it again here.
![]()
To install the printer driver under Windows 2000/XP/Vista or Windows Server 2003, you must log on as a user with administrator rights.
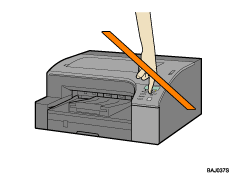
Do not turn on the power at this point.

The following explanation uses Windows XP as an example. Procedures under other operating systems may differ.
Screens vary according to the operating environment.
Start Windows, and insert the provided CD-ROM into the CD-ROM drive.
Quit all other applications currently running.
When you start Windows, the Add New Hardware Wizard may appear. If this happens, click [Cancel]. Check again that the power is off, and then proceed to step 2.
After inserting the CD-ROM, the [Driver, Manual & Utility] dialog box appears. If it does not, double-click the CD-ROM drive icon under [My Computer] or [Explorer], and then double-click [SETUP.EXE].
If the [Driver, Manual & Utility] screen does not appear even when you double-click the [SETUP.EXE] icon, or if an error occurs during installation, access the CD-ROM drive from [My Computer] or [Explorer], double-click the [English] icon, and then install the printer driver by following the instructions that appear on the screen.
Select a language for the interface, and then click [OK].
Click [Printer Driver].
Read the entire license agreement carefully. If you accept its terms, click [I accept the agreement], and then click [Next >].
Click [Connected with USB cable], and then click [Next >].
Check again that the power of the printer is off, and then click [Next >].
Check that the dialog box below appears.
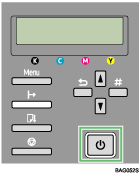
Make sure that the computer and printer are properly connected, and then press the [Power] key.

Installation starts.
Select whether or not to open the Status monitor automatically, and then click [Next >].
Check the installation result, and then click [Finish].
![]()
You cannot select [Connected with USB cable] under Windows NT 4.0.
If the message “Digital Signature Not Found” or the [Found New Hardware Wizard] or [Hardware Installation] dialog box appears:
Click [Yes], [Continue Anyway] or [Install this driver software anyway] to continue the installation.
If the message prompting you to restart the computer appears, restart the computer.
Confirm the printer driver is correctly installed by checking that the [Power] key of the printer is lit and performing a test print.
To perform a test print, open the printer properties dialog box, click [Print Test Page] on the [Maintenance] tab.
To specify a USB port for sharing the printer on a server running Windows Firewall, add the port to Windows Firewall before using Status Monitor.
On Windows Firewall dialog box, click the [Exception] tab, and then select the [File and Print Sharing] check box.
Click [Add Port...], make sure [TCP] is selected, and then enter “55665” in [Port number].
![]()
For details about installing User Guide only, see Installing User Guide.
For details about sharing the printer, see Sharing the Printer.

