

  |  | ||
This section describes the basic operation for sending scan files by e-mail, placing originals on the exposure glass as an example.
Make sure that no previous settings remain.
If a previous setting remains, press the [Clear Modes] key.
If any other function is displayed, press the [Scanner] key.

Place originals.
| Send Email/File -Set Orig- |
Select the destination, and then press the [![]() ] key.
] key.
You can specify multiple destinations as “CC”.
| To=abc.company@ab[A] Next= |
If necessary, specify the sender, and then press the [![]() ] key.
] key.
| Sender= [A] Next= |
If necessary, enter the subject, and then press the [![]() ] key.
] key.
| Default= [A] Next= |
If necessary, specify the “CC”, and then press the [![]() ] key.
] key.
| CC 001=Document [A] Next= |
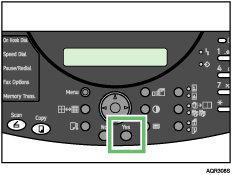
If necessary, specify the color mode, resolution, file type, and compression type, and then press the [Yes] key.
| *Color Gray B&W |
If necessary, specify the items to specify the original, and then press the [Yes] key.
| *ADF(A4 Scan=Yes (Size= |

Scanning starts.
If you place the original on the ADF, press the [B&W Start] key. The scanning starts. After all originals are scanned, the transmission starts immediately.
If you still have originals to send, place them on the machine, and then press the [Yes] key.
Repeat this step until all originals are scanned.
When loading additional originals, if you leave the machine idle for a minute, the job is cancelled.
| Next page? (A4 Scan=Yes (End=No) |
| *Job Cancelled* abc@abc.company.com |
After all originals are scanned, press the [No]key, and then press the [B&W Start] key.

Transmission starts.
File Name
When sending scan files, the file name is automatically generated by the machine. The file name takes the following form:
File name: xxxx_YYMMDDhhmmss_xx.extension
xxxx: Sender Name
YY: Year
MM: Month
DD: Day
hh: Hour
mm: Minute
ss: Second
xx: File Number
Depending on the characters (\, /, :, *, ?, ", <, >, |, Space) used for the sender name, the sender name may be omitted from the file name. In this case, the file name will take the form “YYMMDDhhmmss_xx.extension”.
![]()
If you have selected two or more destinations as “CC”, the destinations can be made to appear one by one by pressing [![]() ] or [
] or [![]() ].
].
To cancel a selected destination, display the destination in the destination field, and then press the [Clear/Stop] key.
To cancel scanning, press the [Clear/Stop] key.

![]()
For details about selecting the destination in step 3., see Specifying Destination.
For details about specifying the sender in step 4., see Specifying Sender.
For details about specifying the scan type in step 7., see Specifying Scan Type", Specifying Resolution, Specifying File Type, Specifying Compression Type.
For details about specifying the items to specify the originals in step 8., see Specifying Scan Size, Adjusting Image Density (Scanner).